Adapting our Halloween teaching, to follow COVID19 protocols, in our flipped classroom

 Schools ,all over the World, have made many changes to keep students and teachers safe during the school year, and class Halloween celebrations have seen changes too.

All teachers, have to follow social distancing and other COVID protocols, every day.

Halloween was very different , in my classes,this year,as well.

With social distancing in place , many of the games and activities we love doing at Halloween were simply not possible this year.

As such, it has been quite difficult for me as a teacher ,to come up with fun Halloween games to do while safely social distancing.

Keep Your Distance

Ηere’s my list of fun social distancing Halloween games and activities that our students can safely do while keeping their distance from others. They worked in my class. I do hope, they will work in yours, as well.

What is it about Halloween that I love so much ? It’s its  FUN element, I guess!

Therefore, I decided to try and bring some Halloween spirit to my class this weird year.

I attempted to teach my students Halloween themed lessons, and to  elicit some  excitement from them, following the protocols. I feel that we, at least, paid Halloween  a pretty good tribute, against all odds.

A few of my favourite non-contact Halloween active games and activities

The first day I started thinking about how to teach about Halloween safely, for both my students and me, I ran into this highly inspiring English Teacher’s video, on Facebook! I decided to give it a try and see if it worked with my very young learners ! Guess what: it did!! We just loved it!

Highly recommended to all English Teachers! And, please, follow this amazing teacher! She is one of a kind, trust me!

Make A Spooky Puppet Theatre

If you’re looking for a spooky activity to do with your students this 🎃Halloween🎃Here’s an idea…Make your own Mini Puppet Theatre (out of a cereal box) and sing-along with 6 monster stick puppets. Watch the video to know more!

https://www.facebook.com/KidsEnglishTheatre/videos/2756291474687434

Another great game I ran into and decided to use in my classes ,both synchronously and asynchronously, is this one, below. I found even more social distancing teaching ideas for Halloween party games to try with my classes, in this amazing site.

Draw A Monster Game

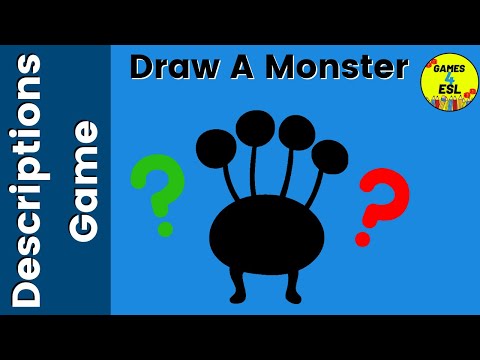
That was a great game to play at Halloween while social distancing. In that game, the kids drew a monster.

To play, I asked each student to grab a piece of paper and something to draw with and then played the video. In the video, the students read a description of a monster. After reading the description, they tried to draw what they thought the monster looked like based on that description.

Once students finished their drawing, I/they played the video to see what the monster looked like.

My students, really loved this kind of activity, especially when their monster drawings looked very similar to the monster in the video. I asked them to work on this video at home, using our asynchronous e-me hive platform but you can follow the same steps, in a school class.

This activity can be easily done at Halloween while social distancing as the students can stay in their seats while they draw their monster, and do not need to be close to or share resources with others.

Halloween Bingo

Halloween Bingo

This next social distancing Halloween game is a Halloween themed BINGO game.

To play, the students were asked to create a Halloween vocabulary Bingo card, in their notebooks, using any 9 Halloween vocabualry words/pictures they wished.

Next, I called out one of the Halloween words, in our vocabulary list, for example ‘ghost’. Then, the students should check their bingo card. If the ghost word/picture is on their card, then they had to cross that Halloween word/picture out.

Then, I called out another Halloween word and again students should check if that word was in their card and if it was, they should cross it out, again. The first student who crossed out all their Halloween words/pictures, was the winner.

Halloween Costume Fashion Show

This social distancing Halloween activity idea is a great way to let kids strut their stuff and show off their fun and scary Halloween costumes.

I always set up an area to be your ‘Halloween catwalk’ and then invite students one by one to walk down the catwalk and show off their great Halloween costumes.

This year, I did that with my 4th graders ,after I had sent them a Halloween vocabulary quizlet and these two relevant songs/videos, in our asynchronous class, first!

I also asked them to visit this , as well as that Thinglink walls , before they decided about what to dress up ,in our school classroom.

To make it feel even more like a fashion show, I snapped some pictures of them in their costumes and shared them with the students’ parents, in our asynchronous class!

Halloween Word Search

Halloween Word search

I am sure that we all have used word search worksheets ,to get our kids familiar with some Halloween vocabulary. But this online Halloween activity also has the added benefit of being perfectly safe to do while keeping a safe distance from others.

Click to download this Halloween word search or see all our Halloween worksheets.

Another cool web tool , which I personally used to create my own word search activities was Liveworksheets. A free teaching web tool, you will love!

Halloween Charades Game

With a little preparation, this classic party game can be turned into a safe social distancing Halloween game.

If you’re not familiar with charades, in this game one person would choose a card -or to make sure this Halloween game can be played while safely social distancing,the teacher shows him/her a card- and then try to act out what is on the card without using any words or sounds.

To make it into a Halloween game, I simply used cards with Halloween related things on them. For example,I wrote/drew Halloween words (ghost, witch, broomstick, etc), Halloween songs (The Monster Mash, etc) or Halloween Movies (Night of The Living Dead, etc). It’s diffrent ,for each different age/level we teach.

I ensured the student acting out the word and the students guessing the word were all at a safe distance.


HALLOWEEN QUIZZES

Usually, these quizzes would be played in pairs or small teams, but seen as that is not possible while social distancing, these quizzes can be played individually, both at home asynchronously ,or in class, using a projector and working in teams.

You can download this pre-made Top Five Quiz with ten questions.

I personally create my own quizzes, such as this one, on a favourite web tool which is similar to Kahoot, called Quizziz.

Students, love it!

Hot Seat

I thought that, this classic classroom game could be easily adapted so my students could play while social distancing.

This time, I decided to use my Halloween flashcards, to play this game.

I asked one student to come to front of the class and stand / sit at a safe distance from other students. Then standing behind the student I showed the rest of the class a flashcard.

Next, the students tried to describe the word on the flashcard without saying the word, and the student at the front of the class should guess what it was. Super fun!

We played apple bobbing and dangling donuts

  1. Apple bobbing – I gave each student their own apple in their own bowl of water, or asked them to hold their own apple tied onto a string and challenged them to take a bite without touching it.I made it a race and gave the winner a prize. 
  2. Dangling donuts – Each student held their own donut tied onto a string. They took it in turns to dangle a donut for each other. The challenge was to eat it with no hands, as fast as possible.

Detail 1: there was spooky music playing ,in the background!

Detail 2: My students ,had to watch a couple of videos similar to this one, in our asynchronous class, when at home, before they attended our school class.

Let’s decorate our classroom

You can check out these Halloween craft activities and decoration ideas or print and colour these free Halloween posters to add a spooky message for passers-by.

In our asynchronous “e-me hive“, my students had the chance to watch several videos, such as this one, or this one, follow the directions there and make their favourite crafts and decorations to bring back to class, the following day.

I decided to ask my amazing 4th graders to watch a video with instructions about how to make paper ghosts using their footprints, at home, and make them ,either themselves or with their parents’ help. Then, they were asked to write about them and decorate their classroom bulletin board with them, after they had presented them in class, of course! Cute!

Let’s make spooky food

What better time to indulge in some jaw-droppingly tasty sweets, than Halloween time?

First, I posted a few delicious Halloween treats ideas, to our asynchronous class and asked my students to watch and prepare their favourite treats, bring them to school and share them, in our Halloween party ! Yummy!

A pumpkin carving contest

I suggest that you treat everyone in the class to their very own pumpkin and see who can come up with the best design. Ι have come to the conclusion that a safe way to get little kids involved is to post a video with instructions in an asynchronous teaching platform and tell them to ask their parents to do the cutting for them, first. Then let them scoop out the insides with a spoon. This how to carve a pumpkin beginners’ guide is a great place to start. This is where we started, in our school classroom.

Another nice video, which I posted in our asynchronous hive, to help my older students curve their pumpkins at home, was this one. For my younger learners, I used this video.

I hope, you will like them as much as we did!

Have a ‘scary’ movie night, at home-or a scary movie…. day, at school

At first, I told them that, during Halloween nights, the people who celebrate it take some tasty Halloween treats and wear their Halloween costumes or  some cool Halloween PJs like these glow-in-the-dark skeleton ones.

Then, I asked them to watch the short film extracts ,which I had created, using one of my most favourite web teaching tools: edpuzzle, asynchronously, together with their families.

Here’s one example of such film extract ,which my youngest students, liked a lot: E.T.: The Extra-Terrestrial .

I even offered them a choice of several other Halloween themed movies, to watch at home, using Quizlet.

Family Halloween movies

Make a spooky music playlist

From Michael Jackson’s Thriller to the Ghostbusters theme tune, I decided to have lots of class fun compiling a spooky playlist to listen to, together with my students. I thought it was safe, to post the lyrics to our asynchronous class first and later,with the use of a projector, have a Halloween karaoke competition, in the school classroom ! It was so much fun! Although, it didn’t last long ,since our teaching hours last only about 40 minutes ! My students were given the opportunity to sing the songs again and again, at home, too, thanks, to our asynchronous class platform posts.

For my very young learners, I did the very same thing , using their favourite Halloween songs, such as this one , this one or even this one!

We all danced and sang happily- in safe distances, of course!

Story Reports

You don’t have to read a book on the page to write a story report. This Halloween, instead of having my students listen to an audiobook or story, I decided to have my wicked witch puppet, Amelia present herself to the class!

It was an active listening activity, using puppetry! I asked them to keep notes, while listening.

Then I had them write a story report based on what they heard, or give a summary of the story to our asynchronous class, in a padlet presentation.

Happy Halloween teaching!

Me, behind the mask!

It all started with…. a mask, the day the schools reopened, after the lockdown!

You see, in the beginning of the school year, I always give my class helpers, a simple badge that can be laminated or put in a badge holder so that children can take it in turns to be a classroom helper. A great resource that the children love and show great pride in being picked as a classroom helper.

But, this is a different school year! Therefore, my helpers had to wear helpers’ masks, instead of …badges!

And this is when I ran into this article and this video, got inspired and instantly decided to create a new project for my students, titled :

“ME, Behind My Mask”.

The project ,in a nutshell

When my students came back to school ,in September,they were asked to mask-up. We always seem to start out school year with a selfie and a class photo, so I was bummed when I thought of the idea of my students drawing themselves with their best facial feature hidden…I was really puzzled, till the moment I read the article, mentioned above, where the idea of this surprise drawing came from.

We simply used paper, permanent marker, coloring markers and crayons.

First, I posted the video and simple instructions ,in our asynchronous class platform and I asked the students to create their Me-behind-the-mask selfies, at home and bring them back to class !

That was a typical example of flipped classroom, of course.

FLIPPED CLASSROOM ,IS HERE TO STAY

Thanks to a handful of educators who care more about their students and their success than keeping the school’s general status quo, the flipped classroom model is no longer a theory, and keeps spreading across more and more educational institutions.

What does a flipped classroom look like? Well, physically, the same as a normal classroom.

But instead of paying attention to lectures while in class and applying the new knowledge in their homework after school, students will watch or listen to the lectures at home, before the class starts, and use the time in the classroom to do their homework. Instead of telling students what to learn, how to learn, when to learn and how to prove that they learned, teachers support them in becoming self-directed learners. I personally, love this!

In our case, my students could submit assessments using online tools, I could send assessments to students via our e-me asynchronous platform. Other online assessment tools, we used included Google FormsKahoot, and Quizlet.

Additionally, your students could be encouraged to submit video recordings of themselves using applications like Flipgrid. Sadly, our parents were reluctant to allow me use any video recordings.

Last, but not least, I made sure that I provided timely, specific, and instructionally focused feedback.

All in all, no one is excited about wearing a mask but…it’s for our safety! And the best thing we can do for our students is to put a positive spin on it, right?

The project, step-by-step

The first thing I decided to do was to teach them the adjectives they would use on their selfies, in order to be able to describe themselves.

I used one of my most favourite online tools: Quizlet.

I used Quizlet to introduce them to adjectives to describe CHARACTER AND PERSONALITY , asynchronously.

I also used youtube videos, such as this one, to teach them about the vocabulary they would need, to describe their APPEARANCE.

Additionaly, I used more youtube videos, such as this , to help them learn how to describe their personalities, asynchronously.

On top of that, I used another of my favourite online tools : edpuzzle. A great tool to create amazing video lessons ,in a minute! Edpuzzle is the missing piece for remote learning! We can also track students’ progress with Edpuzzle’s hassle-free analytics as we flip our classroom!

“The ABC’s of YOU” is probably, my most favourite Alphabet kids song, of all! Please, visit to see for yourselves.

The next step, was to ask them to write a paragraph ,presenting themselves to their classmates. After they had done so in their notebooks , I decided to create a PADLET WALL to have them share their paragraphs, in our asynchronous e-me hive, as well.

My amazing students’ self-portraits BEHIND THE MASK, have been displayed, in a book creator tool, for sometime now! My students, were regularly encouraged to visit it , from home, as well.

Finally, I decided to add all the links we had used both synchronously and asynchronously, in one presentation tool ,which I truly love: Microsoft SWAY ! Highly recommended!

Games we played

To be able to practice all the new words and put theory into practice in class, we have tried several games, in the school classroom.

The games listed below may require some modification to meet the social distancing restrictions but should give any big class a great starting point for coming up with fun games to play.

1.​Name Game

Every member of the class chooses an adjective that starts with the same letter as the first letter of their first name. They put that adjective in front of their first name, and they have their new name. So for example: Joyful Jill. For an added challenge, you can see if people can remember everyone’s names throughout the conversation. 

2.Guess who

The Guess Who ESL game is a fun way to practise describing people adjectives with young students, in-class or as a warmer. I encouraged my students to use the adjectives which describe personality more than the ones which describe appearance.

Specifically, it’s great for question formation and practising the different auxiliary verbs that may be used (e.g. Is she old? Does she have brown hair? Is she wearing glasses?).

A similar game for large kids classes (that doesn’t require any special resources) is Classroom Guess Who.

3.Two Truths and a Lie

This is a fun, classic game that allows students to share some little known facts about themselves while trying to stump their classmates too. Each student will write down two true statements and one lie about themselves. In my class, they were asked to include personality and appearance adjectives in all their statements.

We let them know that they can put these statements in any order as the goal is for the class to try to figure out which one is the lie. Although this can be done without writing it down, I have found that with elementary-aged students it is very beneficial to give students thinking time first. Otherwise, you end up with students who try to think when it is their turn and it makes the truths and lie very obvious.

After everyone is done writing down their sentences, then I go around the room having students read their 3 statements. The class will then vote on which they think is the lie. After the vote, the student will reveal the lie and can explain the truths if there is time.

 4. Quiz Time

As soon as they mastered the target vocabulary, I made my first pop quiz of the year ,about the class. At the end of the first week, I created a pop quiz asking questions about what they learned. My students loved being the stars of the questions!

You can make it a paper and pencil quiz or use an app like Kahoot, Quizziz or Google Forms to make a digital pop quiz. This is a great way to introduce a new type of digital activity that you will use during the year too!

 5. 20 Questions

Play a game of 20 questions (or use the number that is the same as the number of students you have so that each person can ask 1 question). Choose 1 person to pick a secret word(personality adjectives, in our case ) and have them write it down or tell the teacher. Then challenge the class to work together to figure out what the person is. This will require students to listen to each other’s questions, the answers and think about related follow-up questions that might help to narrow down the secret word.

After everyone has asked a question, then let each student take one guess.

6. Bucket List

Each student, comes up with 5 top adjectives from their selfie, on their bucket list. Then they share and see what they have in common, with other class members. They could even take those similarities and use them to connect in the real world .

7.​Pictionary​

Students , brought their selfie ” Me, behind the mask” in class.

Then, they had to describe that picture while the rest have to draw it.

When time was up, or when the person describing decided to stop, they showed their pictures to the rest of the class and the describer chose the winner.

8. True or False?

A great way to reinforce what has just been taught.

Instead of the traditional pop-quiz to see how much the kids retained from the personality adjectives list, I tried something a bit different…

I asked the students to find paper and instructed them to make a collection of scrunched up paper balls. I put two pictures on two different classroom walls , one with a true sign, one with a false one.

I asked a series of true/false questions, using as many personality and appearance adjectives as possible, about different students. If the kids thought it was true, they ditched a paper ball at the true sign, and false if they thought it was false.

While this can be quite messy ,it can be a light hearted way to review what has been learnt.

My conclusions

a.When we reinforce self-esteem and resilience in our students, we equip them with critical skills they need to succeed socially and academically. 

When we communicate genuine, realistic appreciation and encouragement to our students, it’s a powerful way to nurture self-esteem and resilience. 

b.I have to admit, that for kindergarten and primary teachers, teaching younger children while masked ,also presents challenges — specifically related to students’ social-emotional learning.

Non-verbal cues carry up to 55 per cent of the emotional content of messages. Without those cues, a lot of important information is missed.

c.Furthermore, the mouth and eyes are even more important than other facial features when interpreting expression. In contrast to adults who get most non-verbal social information from speakers’ eyes, young children pay most attention to speakers’ mouths. This elevates the challenge of clearly communicating emotions to children while wearing a mask.

d.What is more, vocal strain is a significant occupational hazard in teaching, and the increased volume necessary to be understood when wearing a mask may contribute to this risk.

I really hope, the project idea presented here can enhance the learning experiences of young students in the new world of COVID-19 aware classrooms.

“Out Tree of Wishes” 2019-20 etwinning project

tree 4
For all those -mainly non-European -teachers who keep asking me about what etwinning is about:
eTwinning is the community for schools in Europe.

eTwinning offers a platform for staff (teachers, head teachers, librarians, etc.), working in a school in one of the European countries involved, to communicate, collaborate, develop projects, share and, in short, feel and be part of the most exciting learning community in Europe. eTwinning is co-funded by the Erasmus+, the European programme for Education, Training, Youth and Sport.

eTwinning promotes school collaboration in Europe through the use of Information and Communication Technologies (ICT) by providing support, tools and services for schools. eTwinning also offers opportunities for free and continuing online Professional Development for educators.

Launched in 2005 as the main action of the European Commission’s eLearning Programme, eTwinning is co-funded by the Erasmus+, the European programme for Education, Training, Youth and Sport, since 2014.

Its Central Support Service is operated by European Schoolnet, an international partnership of 34 European Ministries of Education developing learning for schools, teachers and pupils across Europe. eTwinning is further supported at national level by 38 National Support Services.

TwinSpace

The place where eTwinning magic really happens is the TwinSpace; a safe platform visible only to the teachers participating in a project. Students can also be invited in the TwinSpace to meet and collaborate with peers from their partner schools.

One of the most important elements of eTwinning is collaboration among teachers, students, schools, parents, and local authorities. In eTwinning teachers work together and organise activities for their students. They have an active role, interact, investigate, make decisions, respect each other and learn 21st century skills. eTwinning projects involve the contribution of each member of the team. Take inspiration and explore these awarded projects.

Finally, in eTwinning, our work is important and deserves to be shared and recognised locally, nationally and Europe-wide. eTwinning recognises the work carried out by teachers, students, and schools through National and European Quality Labels, eTwinning Awards, eTwinning Schools and the eTwinning Portfolio.

One of our school  inspiring etwinning projects, this year, was a project about… wishing trees!
In “Our Tree of Wishes”project, teachers and students of about…200 European Schools,worked together ! What an unforgetable experience ,for all partners !
dec46
tree map

Our “Our Tree of Wishes” project, in a nutshell

Students 7 to 15 created a collaborative Tree of Wishes.
We  decorated a real or drawn tree using wishes cards written by our students.
They wrote  their wishes ,for a festivity of their choice and hanged the cards on the tree. Then each school prepared a wishes card,to be shared with all partners. The cards from the other countries were printed and they decorated our collaborative Tree of Wishes. Finally we held a ” Best Tree of Wishes Contest”.

Our pedagogical objectives

– The students  improve their language skills

– They learn to express their feelings and wishes

– They develop positive thoughts and create positive wishes and send them to Europe and the world

-They develop their creativity 

– They get to know other cultures and broaden their horizons

– They create collaborative Wishing Trees 

tree 3

Our project detailed plan

AUGUST

1) We wrote our addresses on the page “Our e-mail addresses” and joined the Whatsapp group of the project .

2) We added a marker for our school on the page ” Our schools on the map” 

3) We wrote a brief presentation of ourselves in the project FORUM.

4) On the page ” Organizing the project together” we added our name, school address, number and age of our students.

5) We uploaded our students’ posters, introducing the project to the school community  and the Twinboard, in the  Pages.

6) We added our expectations ,as teachers, at the beginning of the project, in the page “Survey on the project”.

tree 2

SEPTEMBER

1) We presented the project and the TwinSpace, to our students. We also informed them about the netiquette of the project and the e-safety rules by playing the “kahoot” game.

We uploaded photos and/or videos of our students playing the ķahoot game and learning about the e-safety rules, to the sub-page “We learn e-safety in the classroom”.

We invited our pupils, as members of the TwinSpace.

2) Students introduced themselves, in the page “Students introduce themselves”, through a video, a text, or avatars.

3) We joined the project Logo contest: we uploaded our logo suggestions on “Tricider”.

4) We selected 4-5 drawings, which our students had drawn, for the logo contest. We uploaded those drawings to anArt Gallery, made with “emaze”. 

5) All teachers joined the Facebook group of the project https://www.facebook.com/groups/415721049072509/

novem5

OCTOBER

We presented our countries, to our project partners.We created trasnational groups ,to do so .

We created a “Thinglink” account for the project.

When our work was ready,we logged into “Thinglink” and uploaded it to the right country link.

oc21

NOVEMBER – DECEMBER 

Our students wrote their wishing cards and a wishing letter, and shared them with all project partners.

In particular:

1) Each student wrote a simple wishing card in his/her own language. We helped the students translate the cards ,into English. Students , added a drawing to their cards.

We made a video /slideshow, to present our wishing cards.

We uploaded the video on Youtube or Vimeo first. Then ,we posted the link to the Youtube video, in the twinspace.

2) Students wrote a wishing letter, in English for the project partners, helped by their teacher.

The letter was uploaded ,as a pdf file ,to “Materials”, in the TwinSpace. Then we visited the subpage “Our letters to our partners”,and we uploaded our students’ letters.

3) We  printed our students’ wishing cards and all the letters from our partners.We decorated our Trees of Wishes, with them. 

4) Finally, we  took a photo of our own Tree of Wishes and we posted it, in the  twinspace Pages.

oc10

 JANUARY

1) We posted all the photos of our beautiful “Trees of Wishes” ,in a collaborative e-book,made with “Book Creator”.

The Book was uploaded to the page “Best Tree of Wishes Contest”. We used the numbers on the pages of the Book, in order to vote for our favourite trees.

2) We posted  the wishing letters , written by all  partners, in a collaborative e-book made with “Flipsnack”, divided into three volumes: the books were uploaded to an interactive image created with “Genially”.

3) Our students wrote their wishes for all our partners, in the Forum “Our wishes for the New Year”.

4) We completed a survey, in the page ” A survey on the project “

5) Teachers created a common Domino Game using New Year words and pictures, as a nice Holiday gift ,for all student-partners .

6)  Project Evaluation

 We filled in three easy and quick forms: one for the teachers, one for the students and one for the parents. 

7) We applied for the etwinning Quality Label.

novem15

Our own school wishing tree idea,in brief

” Our Tree of Wishes “, our inspiring etwinning project wishing tree ,is a Greek olive tree decorated with origami paper boats !
The idea behind it: during the Festive Season, all around Greece ,you will find Christmas boats (karavakia) decorated with lights and ornaments, which are very traditional and symbolic.
The Karavaki symbolises sailing towards the new life!
According to the Greek Christmas traditions, especially in the islands, kids prepare their own boats with paper and chips of wood, and on Christmas Eve, they use these little boats to collect the treats they receive, when singing the carols (kalanda) from house to house.
dec45

All our project links

Our intro school video: Making our wishing boats and decorating our wishing Tree

“Our Tree of Wishes” etwinning project online meeting

Our final school video ,about our project

“Our Tree of Wishes” etwinning project summary

Our Wishing Trees Art Gallery

Our project interactive map

Our Book of Trees

Our Book of Letters

The TwinSpace Netiquette of the project Our Tree of Wishes

A kahoot game for our students to play and check how much you really know about Internet safety and netiquette (good behaviour on the Internet)

oc19

A list, of all the web tools we used

https://docs.google.com/ : collaborative project plan

https://www.photocollage.com/

https://biteable.com/: project presentation and project netiquette 

https://www.kizoa.com/

answergarden 

mentimeter.com (survey on the expectations from the project) 

renderforest.com

pixiz.com

pizap.com

padlet

oc20

thinglink

vimeo for videos 

vocaroo.com 

powtoon.com

animoto

emaze: art gallery

kahoot :  e-safety and project netiquette

Google presentation: survey on the project 

Scrap coloring

Canva (for posters)

Pic.collage

Snapchat

Screencast-o-matic: tutorials

dec10

Google Maps: interactive map

Pixlr:Online Photo Editor

LearningApps: games

Break Your Own News: creation of posters for breaking news

Logo Maker and MsPainting (for logo – painting/drawing)

https://www.jigsawplanet.com/?rc=play&pid=1adcc321c083

http://www.glitterfy.com/

http://www.postermywall.com/

Blogger: project blog

Book Creator: collaborative ebook

Story Jumper: fairy tale on the tree of wishes

Educandy: instructive games

Flipsnack:  books of letters

oc22

Balloon tennis- a fun word game

This fun game, comes from Olha Madulus’s Blog!

When Olha, first mentioned the game on her facebook page , I told her that I loved the idea and asked her if I could try it in my class! She agreed and  was kind enough, to promise me to write a blog post about the game, as soon as possible!

I adapted the game ,a bit, to suit my classes ,but the main idea worked really well with my students , therefore, it is highly recommended to any other colleague, wishing to give it a try, too.

I have to thank Olha, again, for her generosity ! She is one of the most inspiring Teacher Trainers I know!

ma2

This game is suitable for all ages and levels
·       Blow up one balloon
·       Divide your class into two teams (once the students have got used to the game, you can organise them into smaller groups of 2 teams each, each group needs a balloon – but consider the space you have available. You could use the playground for this).


ma3


·       e.g. with younger learners explain that they have to remember vocabulary for food


·       One team starts with a member hitting the balloon across to the opposition team and at the same time shouting (so all can hear) one word for an example of food e.g. chocolate


·       Next a member of the opposition team has to hit the balloon back shouting a different food word


·       If no one can think of a new word or repeats a word – that team loses the point (this encourages the learners to listen carefully)


·       If the balloon drops to the floor – the receiving team loses the point


·       You can score the game like tennis


·       You can change the lexical set whenever necessary


ma4


·       With older learners you can review a topic prior to a writing task e.g. the advantages and disadvantages of the internet


·       Nominate which team should shout advantages and which disadvantages


·       Play as above


This game has a number of advantages


·       It is kinaesthetic and can energise the class


·       It’s a team game and promotes a sense of community


·       The focus is on the balloon and shyer students feel relaxed and more likely to participate


·       You can change/play with the rules to suit your class and any language you want to practise


·       The balloon is quite slow and easier to keep in the air than a ball
ma5
ma7

EASTER Hopscotch

I can assure you that,   students remember and correctly spell about the same number of EASTER  words after learning with HOPSCOTCH, as they do after a teacher-centered lesson.

Importantly however, they enjoy playing this  game very much and they report better attitudes towards studying English after learning vocabulary with HOPSCOTCH and games in general, compared to traditional teaching.

All that is required for this fun game is a few Easter sight words  and sidewalk chalk or masking tape.

On rainy days, consider using masking tape on a floor and write each Easter word on a piece of tape or index card – just make sure kids do not slip on the index card while playing the game.

You can also use the “portable” Hopscotch, like the one in the photo below…You can carry it with you to a different classroom each time, in case you don’t have your own classroom!


  1. You can play with Easter pictures to help aid recognition or practice new words.
  1. Add numbers to aid in number recognition and  practice plurals. eg ” Seven eggs”
  2. Add colors to help with color recognition, too.” Seven red eggs”
  3. Play with spelling words.  Have child read word, then look away and practice orally spelling the word.

  1. With older students, play with vocabulary words –child tells you definition of word they land on.
  1. Play with English words and mother tongue .For example, write an Easter word like “Church” and child has to tell me word in mother tongue..
  1. Spell hopscotch:Give each student an Easter word to spell as she jumps through the boxes. If she spells the word wrong, she must repeat that word on her next turn. The first person to get through the entire board wins a point for her team.

      8.Word hopscotch:Method: – Draw a simple hopscotch outline on the floor with chalk , use tape or use the “Portable” version of it.

– Children take turns to hop (walk or jump) from square to square – On each square they say an Easter word that they know. These may be words in general, or words    associated with a particular Easter topic or theme, eg Spring, Food, Traditions etc. – When they run out of words they must ‘give up’ .

Variation: – Teacher puts pictures /flashcards of familiar Easter objects on each square -Children must name the objects as they hop onto the square…… More difficult:  -Children must say something about the object in the picture.

Hippo and 1st graders! The importance of a mascot in class

Class mascots can be “friends” that help the students on their learning journey.

Our own ,1st graders class mascot, is our cute Hippo!!

Hippo, plays various roles in our classroom. He sits and watches over our class to make sure they are doing the right thing or plays and sings with us  ! He is the reason, my little ones want to learn English- to be able to communicate with him, without my…help!

Having a class mascot adds a little fun and humour to the classroom, too. We often laugh about what Hippo has been up to on the weekend, and his ability to fall asleep at any moment, is an ongoing lesson!

The students have helped to develop Hippo’s personality and interests.

If you have never  used a class mascot before, here’s  how to get started:

Choose a particular stuffed animal or toy as your class mascot and have children decide upon a name for their new friend. Then brainstorm with children some background information about the mascot. Some ideas might be:

  • Where and when it was born
  • All about its family
  • What its personality is like
  • How it got its distinctive features
  • Its best friends
  • What it likes to do
  • Where it has already traveled

The children can not only learn from the mascot, but can also  teach the mascot what they have learned .

The mascot can award stickers or small rewards to students who have  positive behavior for the week! Maybe the mascot could bring in his/her favorite book  for a read aloud. I have done this with the book “Hippo and friends” and have shared my experience in this blog post!

Use your imagination and think of how to integrate the puppet into your daily routines and teaching. There are so many possibilities!

I find the mascot to be an endearing member of the class. The students love Hippo like a friend.  They respond to Hippo as a teacher and seem to really listen to what he has to say.

The way  students really respond to our mascot, is just fantastic – I wonder at what age that enthusiasm and imagination starts to fade….

I often have other mascots coming to visit us for a couple of weeks… Princess Elizabeth, Hippo’s cousin from London has become the kids’ favourite!

They have even  learned how to bow to Her Royal Highness ! When they heard that she is not married..yet and she’s still looking for her Prince, they started suggesting  their.. brothers, uncles or cousins, for her future husband!! That was hilarious!

There are also some of Hippo’s friends : Mr Owl, Mr Elephant , Miss Duck etc

Kids are looking forward to Hippo’s visit in our class ! They miss him so much!

They talk about him at home! They bring him their own animal friends, to help him  make new friends and feel less lonely  ! They ask him questions about his hometown and country! They want to know more about his family, back home! By the way, his family is a… pink Elephant family-Hippo is…. adopted !- but, they don’t seem to find that weird ,at all ! !

Young learners get attached to mascots very quickly, especially if you bring it to every class and let the students touch, hug and talk to it. My students love offering our puppet water and got very concerned when Hippo got ill and had to go to hospital! Or had to wear glasses ! They also feel the need to give him a hug , each time he misses his mother, who lives in London!

It’s true that, class mascots can quickly give your room a sense of character and responsibility. They’re also a lot of fun! Whether it’s a live rat, a guinea pig, or a plastic potato with a silly grin, your mascot can become an incredibly rich part of the students’ year.

I can’t wait to see what fun we’ll have with Hippo and his friends  ,next!

ABC fun games

dscn9978

Learning the English alphabet is  the very first step to learning the language and achieving fluency. And for our beginning students just learning how to use the English alphabet, here are some fun games I have tried, so far,to help teach and review the ABC in  class.

Most of them I have found online and adapted for my classes.

I have been inspired to use several of them in ELT seminars and teacher development courses I have attended….

I have also included, few games  I have come up with, while improvising in class…

I am also uploading some photos, taken in class this school year, of games that have worked and have been  much fun!

Well, here it goes!


CUP HUNT

dscn9652

  1. Write the letter of the Alphabet on the white sticker or directly onto the cups.
  2. Model how to play in whole group or small group setting.
  3. Have the children close their eyes.
  4. Place a treat under one of the cups.
  5. Chant, “Eye Spy, I Spy.”
  6. Children open their eyes.
  7. Call on students one at a time to guess which cup is hiding the eyeball.
  8. Students read letter of the cup where they think the eyeball/treat  is.
  9. Students lift the cup to see if they are right
  10. Game continues until the treat is found.
  11. Repeat game again.
  12. They can keep  the treat, only if they manage to say a word which starts with it as soon as they find it!

These cups take up less room and work great for letters, words, and numbers too. The students  can:

  • Say the letter.
  • Say the sound.
  • Name something that begins with the letter.
  • Put the cups in ABC order first.

LETTER MONSTER SWATTER

I was inspired to create this the other day and I thought I’d share it if anyone would like to use it. I just printed 2 copies (one for each team ), then cut out the different pieces and glued them together. Then I laminated it and taped it onto a fly swatter with the middle part cut out. It can work as a letter monster, a word monster, or even a number monster


dscn8817

DSCN6012 (1024x768)

LETTER PLATES and CLOTHES PIN LETTER MATCH

I have to thank my friend Andrianni Tsarkou for reminding me of this idea , during her EEPEK workshop , last November in Larissa.

I used a large paper plate and a medium size for this one.  The first I simply took a marker and wrote the letters around it and the second I used my cool “Jumpo ” stickers (needed the bigger plate for the size). Then I took my clothes pins and wrote the letters on those too. I put them in a bowl next to the plate and there you go!

Kids match clothes pins with lowercase letters to uppercase letters on this  paper plate.

You can also combine these two ideas ,like I did in the photos, below..

  r8

r7

WRITING WITH BOTTLE CAPS

r4

Make a  set of “alphabet” caps to help students learn the letters. Write a letter of the alphabet on each cap . Make two or three caps for common letters such as A, E, I, O, U, C, D, H, L, N, R, S, T.

You can give the students words in capital letters  to write them in small letters, and vice versa. They work in teams. The team which writes the word faster, wins!

dscn7980

More ideas:

  • Using the alphabet caps, help students to spell out their names. Are there other words they might be able to spell out with the caps, such as “mom”, “dad”, “dog”, or “ball”?
  • Place all your alphabet caps in a bag and shake them up. Ask  a student to draw one cap out of the bag and read the letter out loud. Then she/he  has to think of something that starts with that letter. Allow for phonetic spellings, for example if she/he says “phone” for the letter “f”.

dscn7981

Even more ideas, I have come across are:

Write letters or chunks on them and make words.

Colored circle stickers are perfect size for bottle caps.

Write words/numbers before you try to stick them on. Its hard to write once they’ve been stuck to the cap –

Write words (person, place, things, actions) on each color and pull out to use as a writing prompt –

Write letters and make a scrabble game –

r5

Write high frequency words and have kids create sentences (color code by parts of speech –

Elkonin Technique for hearing sounds of a given word. Pull down caps as each sound is heard –

Compound Word Matching Game –

Write words on caps and put them in ABC order –

Write sight words on lids and try to stack them in towers up as you read more and more words –

Game pieces for sight word tic tac toe

dscn7979

ABC MINI BOOKS

dscn7851

For this you need: white paper & old magazines or simply ask your students to draw their own pictures.  Each week we choose a new letter to work on. Write the upper and lower case letter on a piece of white paper, then go through old magazines with your Ss to find pictures that begin with that letter (or just draw their own pictures). Let them cut them out and glue them on the paper, which helps them improve their cutting skills too!  The Ss love to look at it over and over.

dscn7874

For instructions about how to make a mini book, read here

dscn7873

THE HAMMMER GAME

I found these hammers at JUMBO, after we had finished with our ABC and basic vocabulary.

I could have made some cards with words on them but, I finally decided to write those words on the board and play there, instead.But, it worked out fine, that way, too!

I called out a word and who ever hit it first with the hammer got  to keep it for their team.

dscn7910

dscn7912

dscn7966

THE SNOWBALL THROW ABC GAME

dscn9549

I use the same game for word recognition, before we finish the Alphabet. If you wish to do the same after you have finished teaching  the Alphabet and some basic vocabulary, you can ask the players to spell the word they hit, or you can spell a word for the players to spot and hit! The teacher could also, call a word in the student’s mother tongue . The players find and throw the snowball at the corresponding English word on the board, to win a point for their team.

If younger  students don’t know the letter sounds yet, you can just call out a letter and they can throw a snowball at it once they find it on the wall. For a faster paced game, you can call out a letter sound and the players throw a snowball at the corresponding letter.

TOUCH AND KNOW

dscn9982

Blindfolds and oversized cardboard letters or magnetic letters ( I have bought them from JUMBO) help our juniors get a feel for the alphabet in this tactile game. Prepare several letter cutouts ( or use the magnetic ones, like I did) and place them in a  box. In turn, have each child wear a blindfold as he draws a letter from the box, feels its shape, and identifies the letter by touch.We play this game in teams and it’s great fun!

dscn9981

ABC RELAY RACE

Have two students, one from each team, stand next to their team alphabet line, on the board . Explain to them that they have to run and write the corresponding small/capital letter , next to each one of the letters in their line .You can even work with letter sounds or ask them to write a word that starts with each letter they see. There are numerous variations of this game… The first team to finish, wins.

dscn0077


This is such a fun game! My students loved it!

Practice letter recognition and letter sounds with a fun game that gets kids moving.

A fun variation, can be watched here

And for more ideas, you can read this …

dscn0076

THE SNAIL BOARD GAME

dscn7845

Well, if I am not mistaken, the original idea belongs to Papadeli Sophia but, I have seen several variations of it, online, so far!

I ask them to say/spell a word that starts with each letter.

An fun ABC board game, played in pairs.


dscn0041


DRAW IT, MIME IT OR SPELL IT

dscn7973

We play this game, with new words or vocabulary I wish them to revise.

dscn7976

Get students into groups of three or four and ask them to sit around a table. Put a set of picture cards face down on each table. Distribute the cards evenly among the group. Tell them their cards are secret! They must not show them or talk about them. Students now think of  how they can draw it, spell or mime it. Give them time, but not too much. Students take turns in , miming, spelling or drawing, while the others in the group guess. The student with the fastest correct answer gets the card with the word. The winner is the person with the most correct answers.

dscn7975

THE ABC SONG PASS-THE-BALL GAME

To help my students remember the ABC song, I have them sing it several times, of course. This is a fun way to do so!

Children develop listening skills, and practice their ABC as they pass the ball around the circle in this cooperative musical ABC game. I tell the children that when they hear a “new” letter , then the ball is passed to the next student.

dscn7879

The last student holding the ball when the song finishes, is the winner and gets special stickers!

They just can’t get enough of this game! We get to sing the ABC song again and again….

If there is doubt as to who is holding the ball, for example half way through a changeover, then tell them to play “paper, scissors, rock”.

Insist that they only pass the ball, not throw it!!

rrextra


“Hippo and friends”-a guest blog post by Margarita Kosior

14441141_10154145818621888_5192880043271904078_n

Margarita Kosior is an amazing educator from Thessaloniki! I truly admire her work with storytelling !

I am so grateful that she accepted my invitation, to share one of her stories, on my Blog! Actually, she has been my inspiration to try similar activities with my junior classes and I wholeheartedly thank her, for that!

Enjoy!

MARGARITA’S POST:

Every storyteller has their own style. Some use music to convey the mood and the emotions, some use puppets, others rely mainly on their own voice, gestures and mimicry. I want my storytelling sessions to stimulate all the senses and engage all types of learners; a song for musical learners, a game for the kinesthetic type, flashcards for visual learners and so it goes. My storytelling session can start with sounds, involve arts and crafts, and end with baking bread. Variety is one of the main ingredients and each session needs plenty of it.

With a touch of imagination, any story, a classic or a reader, can turn into a fascinating journey.

Each one of my storytelling sessions has a variety of goals including improving linguistic competence, artistic and creative expression, involving participants in group tasks, but also allowing time for personal reflection. All these contribute to increased levels of self-confidence of young learners as English language users.

One of the stories I often use in my storytelling sessions is Henry Hippo by Jenny Dooley and Virginia Evans (Express Publishing).

m-1

Photo credits: Magdalena Baca

Together with Henry Hippo and his friends I have visited libraries and schools, I have travelled to other cities and even countries and wherever we went, Henry was a great success.

m-5

Storytelling with Margarita at Sztuklandia, Lublin, Poland

Photo credits: Kinga Łaszcz

As a guest of the English Teachers’ Association of Larissa, Greece, I had the pleasure to entertain groups of children between the ages of 4 and 9 at a local library and a bookstore.

Storytelling with Margarita at the Central Library of Larissa, Greece

m-by-vassiliki

Photo credits: Vassiliki Mandalou

m-by-aphro-2

Storytelling with Margarita at Bookstore “Παιδεία”, Larissa, Greece

Photo credits: Aphro Gkiouris

m-by-aphro-1

Storytelling with Margarita at Bookstore “Παιδεία”, Larissa, Greece

Photo credits: Aphro Gkiouris

The storyline is engaging and fun. Henry Hippo gets stuck in mud. Peter Panda, Millie Monkey and Zara Zebra take turns and try to pull him out; in vain. Finally, Zara Zebra has a brilliant idea. The three animals pull together and manage to get Henry out of the mud. A joint effort brings results and the four friends understand that they are more successful if they work hand in hand.

m-195a7875

Photo credits: Magdalena Baca

Before the students arrive, I set the scene for the story. I use a long piece of blue fabric for the river, a piece of brown fabric for the mud and a piece of yellow fabric for the sun.

Every storytelling session starts with a “Hello” song (it can be any “hello” song, the choice of the instructor). It is good to develop routines. They make the learners feel more comfortable and more self-confident right from the start.

Another routine is opening the Magic Box which hides different treasures every time, usually flashcards or realia which appear later in the story.

m-195a0054

Photo credits: Magdalena Baca

In case of “Henry Hippo”, I create head bands with the four protagonists in advance and I place them in the Magic Box. With the use of a magic star and on the sound of the magic words, the Magic Box opens.

m-dsc_2148

Photo by Margarita Kosior

Every time the group shout: “Magic Box, open!”, one head band is taken out.m-henryHenry Hippo

m-peter

Peter Panda

m-14265068_10154130334391888_1108849046345497662_n

Millie Monkey

m-zara

Zara Zebra

After ample repetition, the participants know the names of the protagonists and are ready for the story. But the truth is that, especially in case of Henry Hippo, the students participate throughout the story. They take turns to wear the headbands, repeat the lines and play out the content of the story as I am reading the lines out. Depending on the age and level of the student, I ask them to repeat either complete sentences, phrases or single words. At turning points in the story (right after Henry Hippo asks for help), I ask the students to anticipate in what way each animal is going to try to help Henry Hippo. This practice creates suspense and builds the atmosphere of anticipation. Curiosity plays an important role in preschoolers’ lives. Young children ask many “why” questions and all the “why’s” have a purpose of getting to the bottom of things.

If the time is enough, I encourage my students to make their own sequel to the story by adding more jungle animals willing to help Henry Hippo get out of mud.

No good storytelling session goes without a song or a chant. I like simple songs; simple enough for the little ones to learn it in five minutes and sing it so loud that people up on the next floor and out in the street can hear them A good song or chant is a good way of revising target vocabulary. The repetitive rhyme and rhythm make it possible for even the youngest learners to join in.

My follow-up activities usually include arts and crafts projects. For Henry Hippo, I would recommend making a hippo magnet.

m-dsc_2164

m-dsc_2163

Photos by Margarita Kosior

I finish my storytelling sessions with a simple goodbye song, easy for even the youngest participants to join in and sing along.

Storytelling provides plenty of benefits to (very) young learners and there is plenty of research to prove it.

The benefits can be divided into three groups: mental, social, and educational. In terms of mental benefits, storytelling boosts thinking capacity; it is an activity for the brain. It provides opportunities for sharing thoughts and ideas as a group. Also, through enjoyable experiences while listening to a story, children will develop their individual reading tastes.

Stories from different cultures help children develop an awareness of the similarities between ourselves and others as well as highlight differences, which can then be explored and discussed in the classroom. Thus, children develop empathy and concern for others in order to understand the concept of social equality and justice. This will motivate them to become active citizens and take on social action in the future. Storytelling also conveys important values: bravery, respect, tolerance, teamwork, patience, generosity, fair play, forgiveness, peace, and other values which, when cultivated systematically, will make your students better people.

Also, through active participation in a storytelling session children internalize the language in a natural way within the scope of the thematic units discussed in class. Analyzing questions, retrieving details and associations triggered by the story, and deciding on answers – all these engage children in active learning.

Overall, storytelling has been shown to build intrinsic motivation and self-esteem.

Personally, I know one thing for sure: an engaging storytelling session creates magic, cultivates a love of reading at an early age and adds variety to your lesson. And these make it worth the effort!


dscn9092

MY COMMENT:

Well, I tried this amazing story telling activity with two different classes of 1st graders, in a small state school with basic facilities, in a timy  classroom and… it really worked!! My kids just loved both the story and Hippo!

This school year, our class mascot is actually a… Hippo hand puppet  therefore,I just told them that Hippo would like to share one of his adventures in a London park, with them!

They ALL wanted to take part in the story!

Our special friends!

Our special headbands!

I followed Margarita’s suggestions and I had them participate throughout the story. They took turns to wear the headbands, repeat the lines and play out the content of the story as I was reading the lines out.

They actually found it really easy to remember specific lines and expressions!

Even today , a month later, they use them in class and.. surprise me!

They say:” Oh, dear!” when I tell them  there’s not enough time for a second game or ” What’s the matter?” when I look sad or angry..They also say ” Help” ,”Pull”, ” Hip-hip Hooray” and so many more, in unpredictable moments during our lessons!

Here are some photos from my class…..

dscn9066


dscn9071

dscn9086

dscn9088

dscn9090

dscn9674

Thanks, Margarita for your creative work and all the inspiration on storytelling!Keep amazing us!